






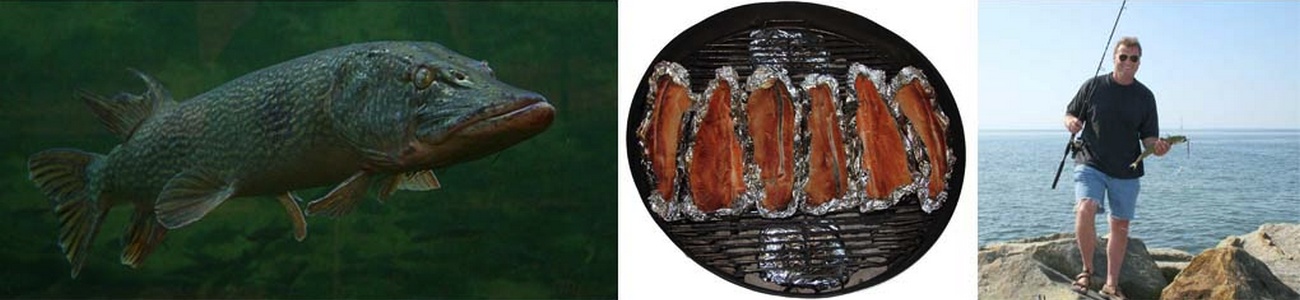



For making cold smoked salmon or trout, bacon, meat or salami, a special oven is needed.
A professional oven in stainless steel is quite expensive and a special build oven in stone and bricks are expensive and big. -Too big!
I looked at the Internet and found a lot of offers and solutions, from building plans and drawings to a giant oven in bricks and even a cheap millboard concept.
None of it suited me.
I'm a craftsman, still got a lot of tools and I'm used to find solutions myself.
So I decided to make an oven of my own design.
There were certain demands to make it work.
- It had to be placed in the shadow, because otherwise it won’t work on sunny warm days.
- I wanted it as small as possible, but still functional.
- I wanted it cheap and easy to build.
I decided to start with a 200 litre oil drum, try it out and see if it was possible to make it work.
Well... Things turned out just right (and a bit lucky) and resulted in a cheap, easy to build and absolutely functional oven for cold smoke. I have gladly used it for years and a lot of people have successfully copied my design. Later I made another oven of a freezer. I want to share both designs with you, so you can build your own oven, if you are used to work with tools. So this is free for everybody, except if someone will try to make money out of it. I want the design to be free for everybody!
Enjoy... :-)
Cold Smoke
Cold smoke??? -Isn’t that hard to do? -Sure... If you don’t know how, it’s not easy. But with a little bit of knowledge, you will do just fine! Actually the process is quite simple and easy to do! -Believe me... You can easily make cold smoked salmon or trout, in high quality. I’ll show you how...
Oven made of an Oil Drum
You will need this to build the oven:
- A 200 litre oil drum,
- two gridirons/grates from an old oven or grill (barbeque),
- some pieces of iron,
- iron plate,
- two hinges,
- rivets,
- a piece of wood,
- paint,
- foam and glue.
You’ll also need some tools.
- Drill,
- Angle grinder,
- riveter and
- some hand tools.
WARNING! Be careful to remove all flammable liquid and fumes, from the drum, before you start grinding. The sparks from the grinder, can ignite flammable fumes and cause an explosion.
From the outside the oven looks like this

Drawn illustration with dimensions
Let's get started - we have a drum, and . . . . How to build the oven - shown in a gallery with comments to most pictures . . .
Rip off the outer edge of the rolling, so the end of the drum will loosen, like the illustration below. For this, you will need a angle grinder. When it is loose, you almost have your lid. Rip off the outer edge of the rolling, so the end of the drum will loosen, like the illustration below. For this, you will need a angle grinder. When it is loose, you almost have your lid. Rip off the outer edge of the rolling, so the end of the drum will loosen, like the illustration below. For this, you will need a angle grinder. When it is loose, you almost have your lid. Rip off the outer edge of the rolling, so the end of the drum will loosen, like the illustration below. For this, you will need a angle grinder. When it is loose, you almost have your lid. Rip off the outer edge of the rolling, so the end of the drum will loosen, like the illustration below. For this, you will need a angle grinder. When it is loose, you almost have your lid. Rip off the outer edge of the rolling, so the end of the drum will loosen, like the illustration below. For this, you will need a angle grinder. When it is loose, you almost have your lid. Rip off the outer edge of the rolling, so the end of the drum will loosen, like the illustration below. For this, you will need a angle grinder. When it is loose, you almost have your lid. Rip off the outer edge of the rolling, so the end of the drum will loosen, like the illustration below. For this, you will need a angle grinder. When it is loose, you almost have your lid. Rip off the outer edge of the rolling, so the end of the drum will loosen, like the illustration below. For this, you will need a angle grinder. When it is loose, you almost have your lid. Rip off the outer edge of the rolling, so the end of the drum will loosen, like the illustration below. For this, you will need a angle grinder. When it is loose, you almost have your lid. Lift the lid off - carefull with the hammer. Lift the lid off - carefull with the hammer. Unsharpning the edges. Unsharpning the edges. Then fit a piece of flat iron as a grip and mount it with rivets or bolts. Then fit a piece of flat iron as a grip and mount it with rivets or bolts. Then fit a piece of flat iron as a grip and mount it with rivets or bolts. Then fit a piece of flat iron as a grip and mount it with rivets or bolts. Spray the base with primer Spray the base with primer Fit a piece of foam and glue it on the lower side of the lid. For this purpose, water based contact glue is fine. This is for avoiding condense water, dripping inside the oven. Fit a piece of foam and glue it on the lower side of the lid. For this purpose, water based contact glue is fine. This is for avoiding condense water, dripping inside the oven. Turn the drum upside down and drill some holes in the bottom of the oven. This will work as air supply, for the fire. Turn the drum upside down and drill some holes in the bottom of the oven. This will work as air supply, for the fire. HatchCut a hole in the drum, just like on the drawing on the top of this page. 35 cm wide and 25 cm high HatchCut a hole in the drum, just like on the drawing on the top of this page. 35 cm wide and 25 cm high Fit the hinges, before cutting the rest. It´s a lot easier to make it right, this way, compared to do all the cutting first. Fit the hinges, before cutting the rest. It´s a lot easier to make it right, this way, compared to do all the cutting first. Cut out the hatch. Cut out the hatch. Unsharping the edges. Unsharping the edges. Mount a stop, so the hatch not are allowed to go into the oven. Mount a stop, so the hatch not are allowed to go into the oven. Cut another piece of metal plate like the picture below and mount them with rivets. By turning the outer metal piece, you can lock the hatch. Cut another piece of metal plate like the picture below and mount them with rivets. By turning the outer metal piece, you can lock the hatch. Like this Like this Like this Like this Drill the 8 holes, like on the drawing on the top of this page. Drill the 8 holes, like on the drawing on the top of this page. Clean and paint the oven with a primer. Otherwise, it will rust. Clean and paint the oven with a primer. Otherwise, it will rust. Cut four pieces of 10 mm round iron in suitable lengths. Bend them in one end only, about an inch in 90 degrees. This will work as a stop, so they won’t fall down. These wil function as foundation for the gridirons. Cut four pieces of 10 mm round iron in suitable lengths. Bend them in one end only, about an inch in 90 degrees. This will work as a stop, so they won’t fall down. These wil function as foundation for the gridirons. Voila!! Voila!!
Be careful. The edge is quite sharp! Fix it with the angle grinder, until the edge is nice and round.
Be careful. The edge is quite sharp! Fix it with the angle grinder, until the edge is nice and round.
Be careful. The edge is quite sharp! Fix it with the angle grinder, until the edge is nice and round.
Be careful. The edge is quite sharp! Fix it with the angle grinder, until the edge is nice and round.
Be careful. The edge is quite sharp! Fix it with the angle grinder, until the edge is nice and round.
Be careful. The edge is quite sharp! Fix it with the angle grinder, until the edge is nice and round.
Be careful. The edge is quite sharp! Fix it with the angle grinder, until the edge is nice and round.
Be careful. The edge is quite sharp! Fix it with the angle grinder, until the edge is nice and round.
Be careful. The edge is quite sharp! Fix it with the angle grinder, until the edge is nice and round.
Be careful. The edge is quite sharp! Fix it with the angle grinder, until the edge is nice and round.


Now your lid is done.
Now your lid is done.


Fireplace
The fireplace are made of a piece of ungalvanized iron plate, sized about 30 * 45 cm. Bend up the edges like the picture below.

Rebuild two grates so they fit in the oven, like shown below. Two grates from a 57 cm Weber grill fits too.

It is also possiple to use grates from a 57 cm Webergrill. -They fit perfect.

Place the oven on some bricks or pieces of wood, so air can flow beneath the oven.
Place the oven in the shadow and not in a windy place. Mine is placed in a shed. Be prepared, that it will smell of smoke, when it’s in duty.
Now your oven is ready!
Build it bigger
Sometimes it can be useful if the oven can smoke more items at the same time. It´s also a way to save sawdust. Anyway, it´s quite easy to place another drum right above the oven.
Two drums. Make an oven, like the description abowe, out of one of the drum.
How to proceed with drum no. two is shown in a gallery with comments to most pictures . . .
Mark the top of the other drum, offset a bit from the edge. It will work as mount for the lower grid. Mark the top of the other drum, offset a bit from the edge. It will work as mount for the lower grid. -And cut it. -And cut it. Like this. Like this. Then flip the drum upside down and rip off the outher edge of the roling and remove the bottom of the drum. Then flip the drum upside down and rip off the outher edge of the roling and remove the bottom of the drum. Like this.. Like this.. Flip the drum again. Mount a few pieces of metal plate, to fit the two drums together. Flip the drum again. Mount a few pieces of metal plate, to fit the two drums together. Violá. Violá. Mark the hatches with a speedmarker and cut the hinges side. Mark the hatches with a speedmarker and cut the hinges side. Then mount the hinges, before cutting the rest. Then mount the hinges, before cutting the rest. Cut the hatches out, when the hinges are mounted. Cut the hatches out, when the hinges are mounted. Round the edges. Round the edges. Mount some stops and locks. Mark mountings to the grids. Mount some stops and locks. Mark mountings to the grids. Weld or fit the mountings with rivets. Holes and steelbars also can work. -Do it as you wish. Weld or fit the mountings with rivets. Holes and steelbars also can work. -Do it as you wish. Then paint the oven with a primer and let it dry. Then paint the oven with a primer and let it dry. Fit the parts together. Fit the parts together. Place the grids.. Place the grids.. And you´re done.. And you´re done..


Cold smoked salmon or trout
Cold smoked salmon or trout, are a process where the salted filets are smoked long time in low temperature, between 1 and 25 degrees Celsius. If the temperature gets higher, the fish fall apart and the result is a grumsy boring filet. So... DO NOT try to cold smoke in warm weather where the air temperature is higher than 25 degrees Celsius.
Salting
First the filets need salting. The easiest way to do that, is dry salting. Salting draws a lot of fluid out of the meat, so the filet will appear more compact after salting. How hard you want to salt the filets, are a matter of taste. I’ll recommend to dry salt your first filets about 2 - 3 hours. After that, you can adjust it too your taste.
If you don’t know how to filet your fish, you can find some help here: Filetér fisken. I know it’s on Danish, but perhaps you can figure it out by looking at the pictures.


Sawdust and smoke
 Sawdust is not just sawdust.
The most common material for cold smoke is beech. Anyway, other types of hardwood can be used, but I’ll recommend beech!
It has to be dried out. So you have to use special treated sawdust, exactly made for cold smoke.
Try to contact the nearest smoke house and buy your smoking sawdust there.
NEVER use sawdust containing pine!
Also make sure NOT to use sawdust that is fungal infected.
Light the oven
A 5 - 7 cm thick layer is needed. -Otherwise it won’t burn.


Cold smoking filets of salmon or trout, takes about 24 - 27 hours. Perhaps you like it more or less smoked, but I think you should smoke the fillets 24 hours the first time. It tastes like heaven.
Add more salt
If you like, it’s possible to add more salt. Try to taste the filets after 15 - 20 hours in the smoke oven. If they need a little more salt, you can easily add a little bit more. But be careful. You can only add salt... Not remove it!


By the way... Parasites can live inside the filets. To avoid any disease, freeze the filets in more than 10 days. You can do this before or after the cold smoking.

How to build a oven for cold smoke of a freezer
Allthough i´ve been very happy about my Oil drum oven for many years, still there was some issues to be solved. Often the weather is too varm for coldsmoking, so previous, I just had to wait for cooler weather to come.
I thought about it and found the solution in a freezer. Actually it´s quite simple to rebuild a freezer or a refridreator to an oven for cold smoke.
I´ll show you how I did, so you can build your own oven a similar way...
But! -Before you choose this solution, you must know about a few problems!
Condense water will be a challenge! -By adjusting the airflow and temperature, most of it, can be avoided, but not complete. The problem cause a different taste in the meat, witch I dont really like. Therefore I´ll not recomment this type of oven, unless you absolutely have to coldsmoke in warm weather. Personally, I have rejected the model and returned to the good old fashion way.
WARNING: If you choose to hang your meat in hooks, make sure to leave a grid below the meat! Otherwise you risk, a chunck of meat to drop down and tilt the fireplace and cause fire!
We start up with this freezer


You will need:
- A freezer or a refrigerator with grates. If you cant find a model with grates, you´ll have to made theese.
- A little aluminium plate.
- A piece of iron plate.
- Bolts and nuts.
- A couple of wood pieces.
- A thermometer.
- Spray paint - primer.
- A drill, drill bits, shear, vices, hammer, saw, circle tool and a few wrenches.
How to proceed - shown in a gallery with comments to most pictures . . .
-
Remove the drawers so the grates are clear.
Remove the drawers so the grates are clear.

-
I was lucky to find a freezer with grates, so I did´nt had to made them myself.
I was lucky to find a freezer with grates, so I did´nt had to made them myself.

-
To make the burning sawdust develope the right amount of smoke, there has to be some control of the airflow. The easiest way to do that, is to supply the oven with a couple of vents.I cut two pices of aluminium, diameter approx 18 cm.
To make the burning sawdust develope the right amount of smoke, there has to be some control of the airflow. The easiest way to do that, is to supply the oven with a couple of vents.I cut two pices of aluminium, diameter approx 18 cm.

-
Marked them with a circle tool, so they vere ready to drill.
Marked them with a circle tool, so they vere ready to drill.

-
Started by drilling 8mm holes.
Started by drilling 8mm holes.

-
Measured and drilled the two centerholes in the oven door. One in the bottom of the door...
Measured and drilled the two centerholes in the oven door. One in the bottom of the door...

-
-And one a bit higher.
-And one a bit higher.

-
After bolting the vents, I drilled one hole through the door in each vent. -Just one! -For now..
After bolting the vents, I drilled one hole through the door in each vent. -Just one! -For now..

-
Then I fit an extra bolt in the vent, so it´s locked in position. -Then it wont turn, while drilling the rest of the holes.
Then I fit an extra bolt in the vent, so it´s locked in position. -Then it wont turn, while drilling the rest of the holes.

-
Ready for drilling.
Ready for drilling.

-
When all the holes are done, I dismounted the vents and redrilled to 16 mm. Except, of course, the centerhole in each vent, cause they allready fits to the bolts!
When all the holes are done, I dismounted the vents and redrilled to 16 mm. Except, of course, the centerhole in each vent, cause they allready fits to the bolts!

-
Clean up the edges with a file.
Clean up the edges with a file.

-
Done and ready for painting.
Done and ready for painting.

-
Paint the holes to avoid rust.
Paint the holes to avoid rust.

-
Painting with primer done.
Painting with primer done.

-
The matching holes in the vents, also were redrilled to 16 mm.
The matching holes in the vents, also were redrilled to 16 mm.

-
Bend out the vent handles and fit the vents to the door.
Bend out the vent handles and fit the vents to the door.

-
By turning the vents, it´s now easy to control the airflow.
By turning the vents, it´s now easy to control the airflow.

-
Cut two pieces of wood and place them in the bottom of the oven.
Cut two pieces of wood and place them in the bottom of the oven.

-
Ready for the fireplace...
Ready for the fireplace...

-
The fireplace is made of a piece of ungalvanized iron plate. It fits quite sharp, but is made so it has approx 1 cm of space from the edge of the fireplace to the oven wall. The wall of the oven are made of plastic, so there is no need to heat it! -1 cm between the fireplace and the wall, will avoid this. I recommend 1 cm of space...
The fireplace is made of a piece of ungalvanized iron plate. It fits quite sharp, but is made so it has approx 1 cm of space from the edge of the fireplace to the oven wall. The wall of the oven are made of plastic, so there is no need to heat it! -1 cm between the fireplace and the wall, will avoid this. I recommend 1 cm of space...

-

-
I fit a thermometer in the door. Now it´s easy to watch the temperature in the oven.
I fit a thermometer in the door. Now it´s easy to watch the temperature in the oven.

-
I cleaned the oven. It was done..
I cleaned the oven. It was done..

-
Ready, set, go !!!!
Ready, set, go !!!!


I tested it, on a warm summerday. There was around 26 degrees Celsius in the shadow and even the night was warm. If it worked under these circumstances, it would work allways... At least in Denmark! ;-)
Actually I was afraid of problems with condensation, but my worries were in vain. -I have not experienced any problems in that direction at all.It worked perfect!
Elektronic temperature control of the oven
 Of course it´s possiple to turn the freezer on and off manually, but... It´s a lot easier to let it happen automaticly!
So I mounted this little electronic device to control the temperature automaticly. Im sure there is a lot of similar devices on the marked, so try to find one who fits the electrical system in your area.
Mine is called "UT-200-2" and are easy to use. It is digitally adjustable, so I could easily adjust the temperature range I liked. 17 to 5 degrees Celsius was chosen and was quite suiteble.
A device like this, is simply able to make a freezer act like a refridgerator.
This solution works amazing and this is my final setup.
< < - - Here is a picture of my UT-200-2.
 < < - - Time to pass on the old oven
Sliced Filets
First you have to remove the pin bones. For this purpose, a pean is perfect. With the pean, you can simply pull the pinbones out.

To cut the slices, a filet knife is perfect. By sloping the cuts, the slices are getting wider and better looking. Like below, you even can place a double layer of slices on the tray.

Man kan jo også lave det helt kunstnerisk og få tingene til at "gå op i en højere enhed". ;-)

Juniper berry, spices, sugar and chili.
Try to add some juniper berries in the sawdust, when smoking. Also try to add some spices in the sawdust.
If you like it "Indian style", try to add a little bit of sugar and chili to the filets, after the salting.
I hope that this will convince you that cold smoking are quite easy and cheap to do. Also that it’s a funny way to experiment and improve your cooking.
Have fun...
Mik Andersen